How to Create a WhatsApp Broadcast Campaign Using Acele
Running WhatsApp broadcasts with Acele is simple, powerful, and highly effective. Follow this step-by-step guide to create, schedule, and personalize your campaigns for maximum impact.
Step 1: Go to WhatsApp Broadcasting
- Log in to your Acele dashboard.
- From the sidebar, go to Broadcasting → WhatsApp Broadcast.
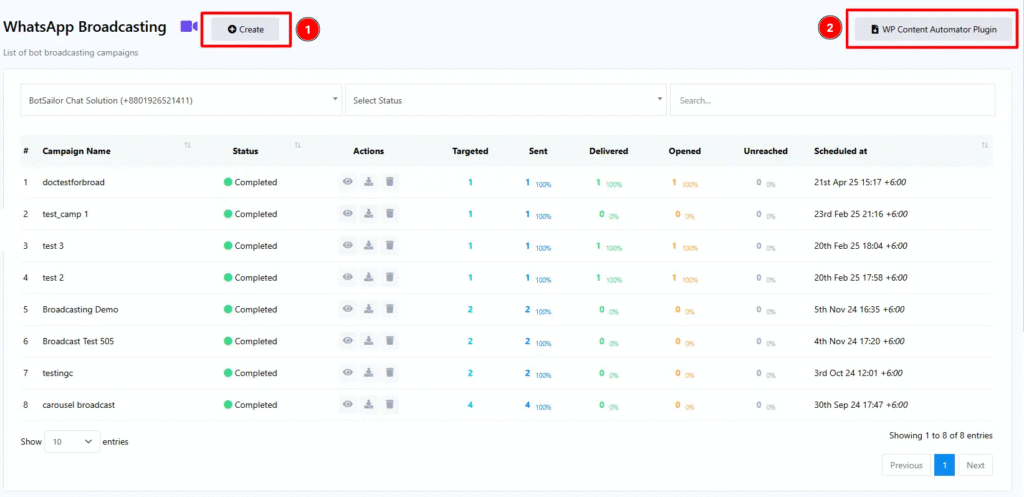
- You’ll see a list of existing campaigns with statuses and performance reports.
Step 2: Start a New Campaign
- Click the Create button at the top.
- A campaign setup panel will open.
- (Optional) To auto-broadcast new blog posts, you can use Acele’s WordPress integration plugin.
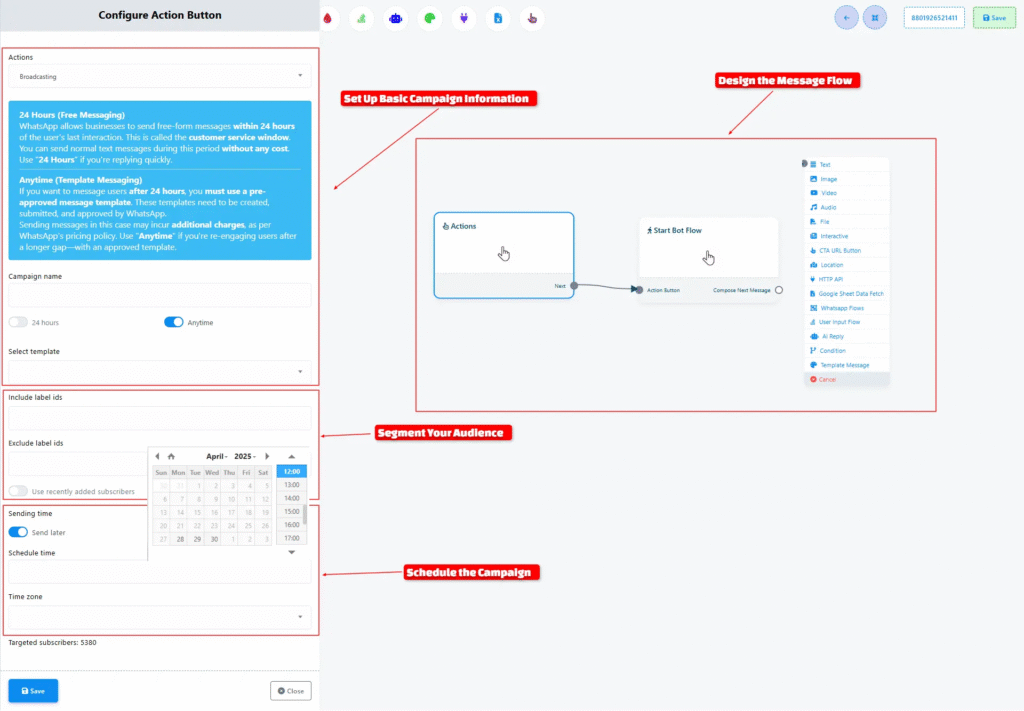
Step 3: Set Up Campaign Information
- Campaign Name: Enter a unique name to identify the campaign.
- Messaging Type:
- 24 Hours: Send free-form messages within 24 hours of user’s last interaction.
- Anytime: Use a pre-approved WhatsApp template to message users beyond 24 hours.
- Message Template: If using “Anytime”, select your approved template from the dropdown.
How to Create WhatsApp Message Templates in Acele
- Go to Bot Manager → WhatsApp Bot Manager
- Select your bot account → Click Message Templates
- Click Create and fill in:
- Template name, category (Transactional/Marketing), language
- Message content (with variables if needed)
- Footer text (optional), and buttons (CTA or quick replies)
- Save and submit for WhatsApp approval
- Track approval status via Check Status
Why Use Templates?
- ✅ Compliance-Ready: WhatsApp-approved formats
- ✅ Higher Delivery Rates
- ✅ Reusable: Save time for future broadcasts
- ✅ Personalization: Dynamic variable support like {first_name}
Step 4: Segment Your Audience
You can target specific users based on:
- Include Label IDs: Choose subscriber groups (e.g., “loyal_customers”)
- Exclude Label IDs (optional)
- Recently Added Subscribers: Toggle ON to target new contacts
- Subscribers Added After [Date]: Filter based on signup date
Step 5: Schedule Your Campaign (Optional)
- Choose Anytime messaging type
- Set desired date, time, and time zone
- Campaign will auto-trigger at the scheduled time
Step 6: Design the Message Flow
- After setup, use the drag-and-drop editor to build your broadcast:
- Add: Text, Images, Videos, Audio, Files, Interactive Buttons
- Add logic: User Input Flow, AI Responses, Google Sheets Fetch, API triggers
Step 7: Add Delays & Smart Filters
- Delays: Add time gaps between messages to feel human
- Filters: Segment by behavior or user data
- Personalization: Use variables like
#first_name#,#phone#,#email#for dynamic content
Step 8: Save and Launch
- Click Save to finalize the campaign
- If scheduled → it will go live at set time
- If not → manually launch the campaign
✅ Real-Life Example: How a Restaurant Used Acele to Boost Sales
Sarah, owner of Chops & Hops, wanted to promote a “Buy 1 Get 1 Burger Deal” just to recent visitors.
With Acele, she:
- Filtered by label: “Recent Visitors”
- Excluded Vegetarian users
- Scheduled the campaign for Saturday at 10:00 AM
She designed a message with:
- 🍔 Personalized text: “Hi #first_name#! This weekend only: Buy 1 Burger, Get 1 Free!”
- 📸 A juicy burger photo
- 🔘 CTA button: “Reserve a Table Now”
Result? Within minutes:
- Replies, bookings, and shares exploded
- Sales went up—without lifting the phone
📌 FAQs
Q: How can I send bulk WhatsApp messages with Acele?
→ Use Broadcasting → WhatsApp Broadcast. Define your audience, design your flow, and send instantly or schedule it.
Q: What messaging types are available?
→ Two types:
- 24 Hours: Free-form within session window
- Anytime: Template messages outside 24-hour window
Q: How do I segment my audience?
→ Use Include/Exclude Labels, filter by recent additions or signup dates.
Q: Can I schedule WhatsApp campaigns?
→ Yes, with “Anytime” messages, you can schedule campaigns for a specific time and time zone.
Q: Can I personalize broadcasts?
→ Yes. Insert dynamic variables like #first_name#, #phone#, etc., for every user.