Create and Use WhatsApp Message Templates for Elementor Form Automation
Elementor forms are one of the easiest ways to collect leads on a website—but what happens after someone hits “Submit”? Without instant follow-up, those leads often go cold. That’s where WhatsApp Message Templates with Acele come in.
With Acele, you can connect Elementor forms to WhatsApp and automatically send message templates to your customers. Whether it’s a confirmation, onboarding message, order summary, or welcome note, you can instantly reach your leads in their WhatsApp inbox with rich, interactive messages.
✅ Use Cases
- Instant engagement after website form submissions
- Lead nurturing with template-triggered WhatsApp Flows
- Auto-responses for booking, contact, or support forms
🚀 Benefits of Using WhatsApp Templates with Elementor Forms
- Instant reach on WhatsApp—where users are most active
- Bypass the 24-hour rule using approved message templates
- Boost conversions with real-time follow-ups
- Trigger WhatsApp Flows using form data
- Hands-free automation—no manual messaging required
🔧 Prerequisites
Before setting this up, make sure you have:
- ✅ A connected and verified WhatsApp number in Acele
- ✅ An approved WhatsApp message template (with quick reply or CTA button)
- ✅ A WhatsApp Flow (optional, for follow-up)
- ✅ An active Elementor form that collects at least a WhatsApp-formatted phone number
✏️ Step 1: Create a WhatsApp Template in Acele
- Log in to the Acele Dashboard
- Go to Chatbot Manager > WhatsApp Bot > Templates
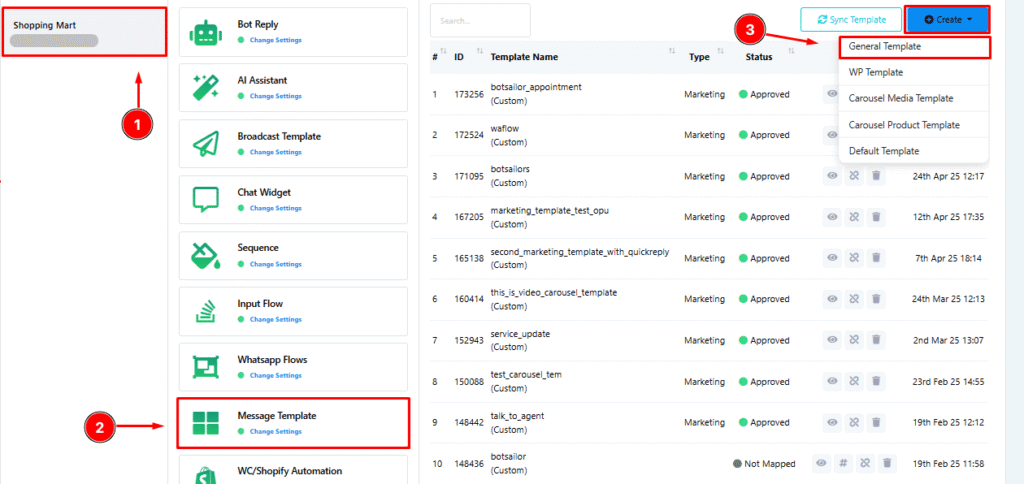
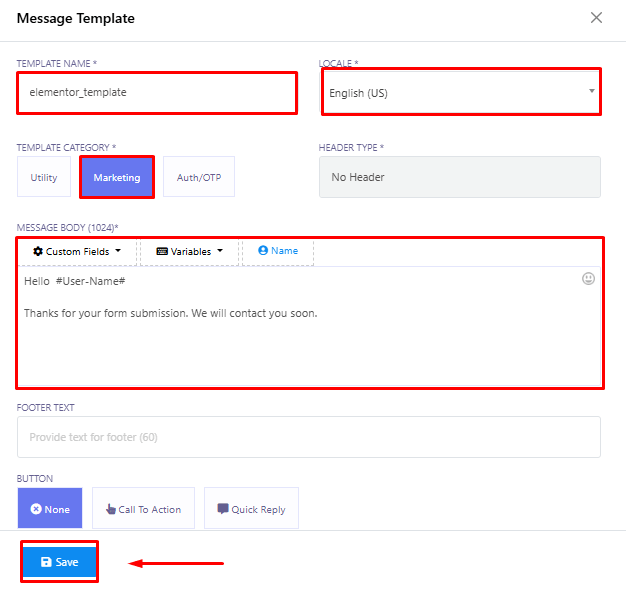
- Click Create Template and fill in the fields:
- Template Name: Use lowercase with underscores (e.g.,
lead_followup) - Category: Select from options like Marketing, Utility, etc.
- Locale: Choose your template language
- Message Body: Include dynamic fields (e.g.,
Hi {{1}}, thanks for contacting us!) - Footer (optional): Add your brand signature
- Buttons (optional): Add CTAs or link buttons (if required by your flow)
- Template Name: Use lowercase with underscores (e.g.,
- Click Save & Submit to send for Meta approval
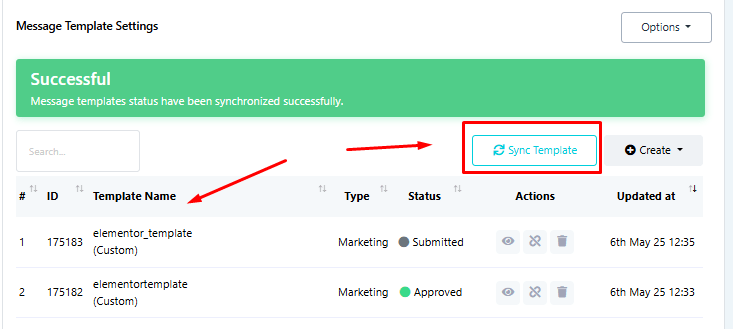
🔄 After saving, click the Sync Template button. Approval is typically within minutes but may take up to 24–48 hours.
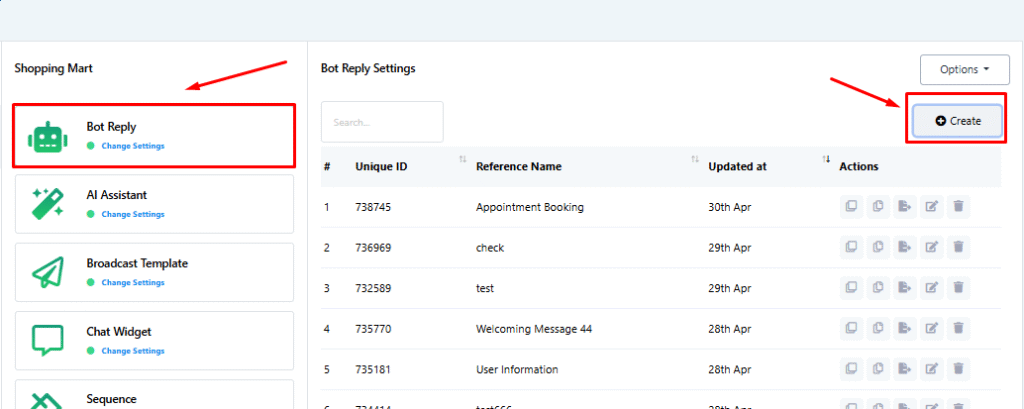
🔄 Step 2: (Optional) Create a WhatsApp Flow for Follow-Up
If you want a multi-step interaction after sending the template:
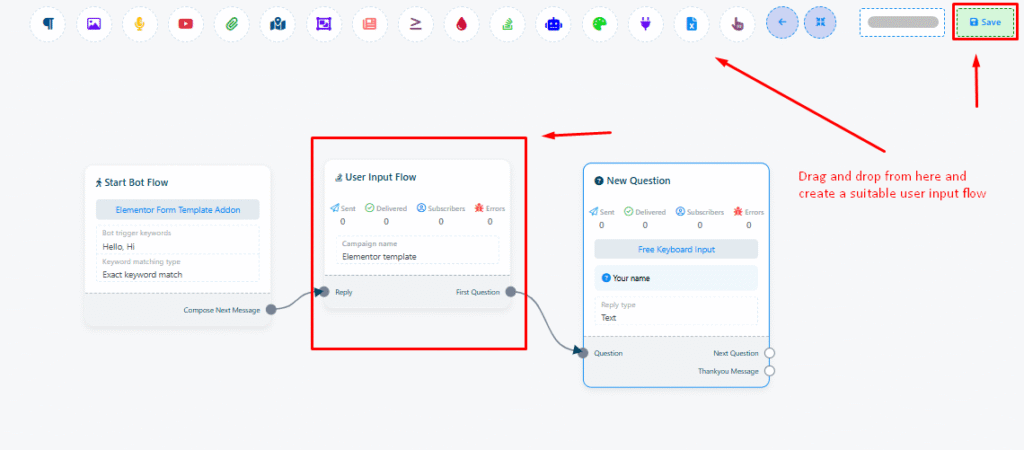
- Navigate to Chatbot Manager > Create New Flow
- Use the drag-and-drop builder to design your follow-up
- Add form fields like name, email, service preference
- Save and Publish the Flow
For detailed flow building, check out the Input Flow documentation.
🔗 Step 3: Connect Elementor Form to WhatsApp Template
Follow your webhook or automation plugin’s guide to send Elementor form submissions to Acele.
Make sure:
- The phone number is passed in international WhatsApp format
- Form data maps to template variables (e.g., {{1}}, {{2}})
- The form submission triggers the correct WhatsApp template using Acele’s API or webhook integration
✅ Conclusion
Integrating WhatsApp Templates with Elementor Forms in Acele allows you to automate instant engagement, reduce drop-offs, and increase conversions. Whether it’s a new lead or a booking request, your response lands directly in their WhatsApp—where they’re most likely to see it.
👉 Ready to automate your Elementor form responses? Start building with Acele today.
❓FAQs
Q. Do I need an approved template?
Yes, all outbound messages beyond the 24-hour window must use a Meta-approved WhatsApp template.
Q. Can I personalize messages using form data?
Absolutely. Map form fields to dynamic template variables like name, service, or date.
Q. Can I use this with Contact Form 7 or WPForms?
Yes! As long as your form plugin supports Webhooks or integrations, you can connect it to Acele’s automation system.