Applying Labels and Segments to Subscribers in Acele
Labels and Segments are essential tools in Acele for organizing, filtering, and targeting subscribers based on their interests, behaviors, actions, or stages in your marketing funnel.
In this guide, you’ll learn:
- What labels and segments are
- Why you should use them
- How to create, assign, manage, and apply them effectively across your bots
What Are Labels in Acele?
Labels are simple tags that you can attach to any subscriber to describe or categorize them. Think of them like sticky notes that tell you something meaningful about a user.
Examples:
- “New Lead”
- “Purchased Product A”
- “Webinar Attendee”
- “Needs Follow-Up”
What Are Segments?
In Acele, segments are not a separate feature, but are created by combining filters (such as labels, sequences, status, or custom fields) inside the Subscriber Manager. These dynamic groups allow you to:
- Create precise audiences
- Trigger broadcasts or sequences
- Export targeted data
✅ Example Segment: All WhatsApp subscribers who are “Subscribed”, have the label “High Intent”, and are not in any sequence.
Why Use Labels and Segmentation?
Applying labels and filtering subscribers into segments gives you superpowers like:
- Highly-targeted marketing
- Clean database management
- Behavior-based automation
- Retargeting campaigns
- Support tagging for human follow-up
How to Create and Apply Labels in Acele
🔹 Step 1: Go to “Manage Labels”
- From the Subscriber Manager page, click the “Manage” button in the top-right corner.
- Select “Manage Labels”.
- Click the “+ Create Label” button.
- Enter a name (e.g., “Hot Lead”, “Trial User”) and save.
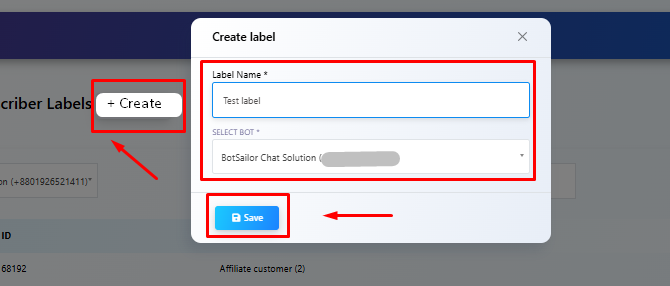
📌 Tip: Use clear, consistent names so your whole team understands them.
🔹 Step 2: Assign Labels to Subscribers
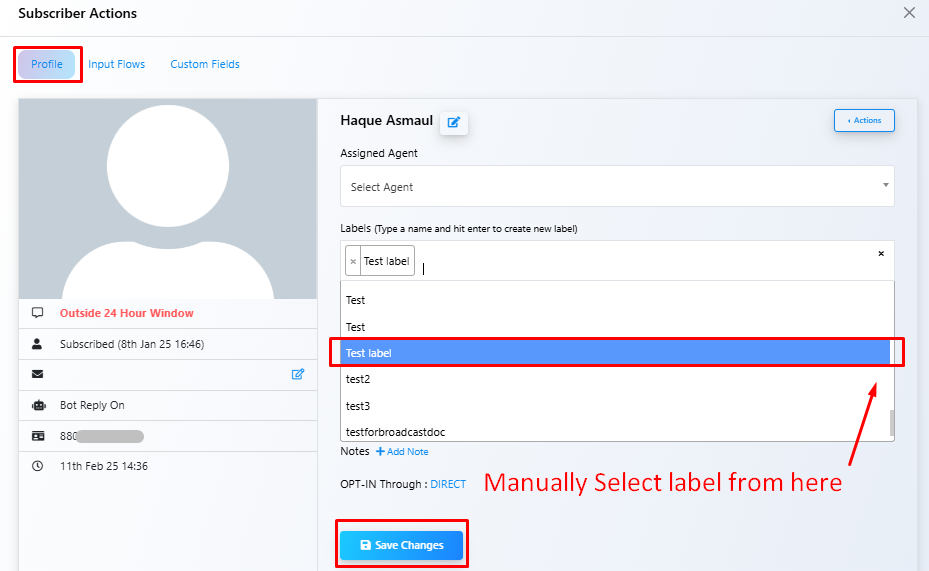
Manually (One by One)
- Open Subscriber profile
- In the “Profile” tab, find the “Labels” section
- Type/select the label → Click “Save Changes”
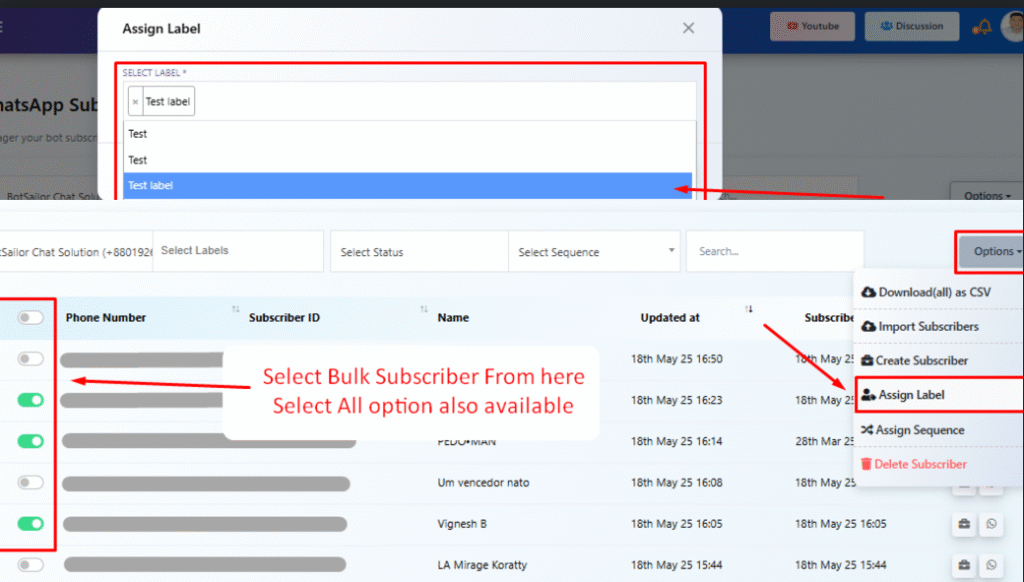
✅ Bulk Assign (Multiple Subscribers)
- Use filters/search to select users
- Click the checkboxes (or “select all”)
- Click “Options” → Choose “Assign Label”
- Select the label → Confirm
🔹 Automating Label Assignments
Labels can also be applied automatically via:
- Chatbot Flows: Add a “Set Label” step
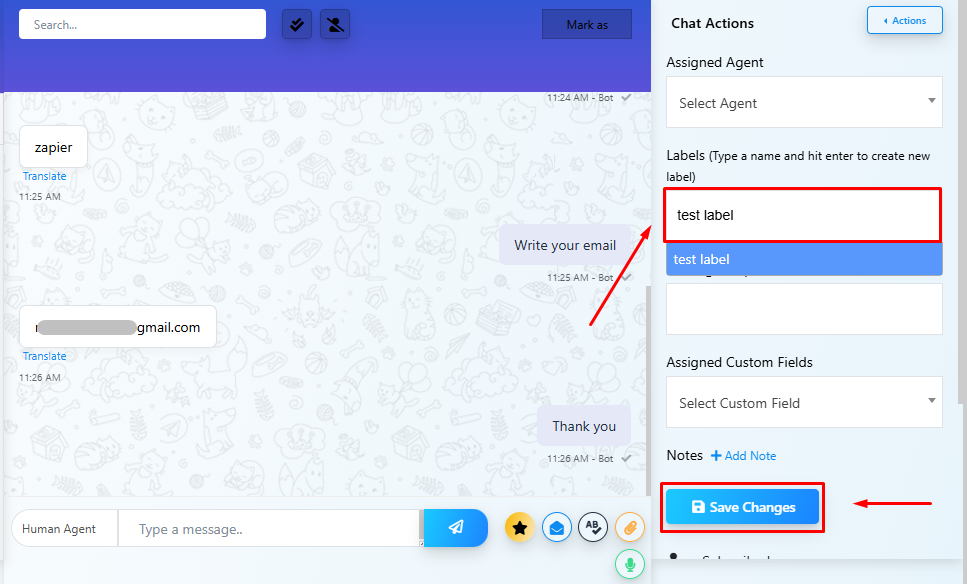
- Live Chat Interface: Add labels while chatting
- Input Flows: Assign based on user responses

- Sequences: Apply labels on completion or based on triggers

Using Labels for Segmentation (Dynamic Filtering)
After assigning labels:
- Use the Select Labels dropdown in Subscriber Manager
- Combine with filters like:
- Subscribed status
- Assigned sequence
- Custom fields
- Bot selection
Examples:
- Users labeled “Abandoned Cart”
- Telegram users tagged “Engaged” but not in a sequence
- WhatsApp users with label “Webinar Registered” AND have filled email
Taking Action on Segments
Once filtered, you can:
- Send Broadcasts
- Assign Sequences
- Export as CSV
- Delete or Unsubscribe
Best Practices for Labeling
✅ Be consistent with naming
✅ Use funnel stage labels (e.g., “Qualified Lead”)
✅ Review unused labels regularly
✅ Combine with custom fields for precision
✅ Create action-based labels (e.g., “Clicked Ad”, “Viewed Product X”)
FAQ
Can one subscriber have multiple labels?
Yes.
Can I remove a label from a user?
Yes, click the “x” on the label in their profile and save.
Are labels shared across bots?
No, each bot has its own set of labels.
Can labels trigger automations?
Yes, labels can trigger flows or sequences.
Labels vs Custom Fields?
- Labels: Used for grouping/filtering
- Custom Fields: Store user data like email, city, budget for personalization