We are very excited to announce the WhatsApp embedded sign-up on Acele. Now, you no longer need to follow a lengthy process to create your WhatsApp Cloud API and then connect it to Acele. Creating a WhatsApp Cloud API manually takes time and is very complicated. Now, Acele users can simply sign up for a WhatsApp Cloud API account from Acele, and the account will be automatically added to Acele.
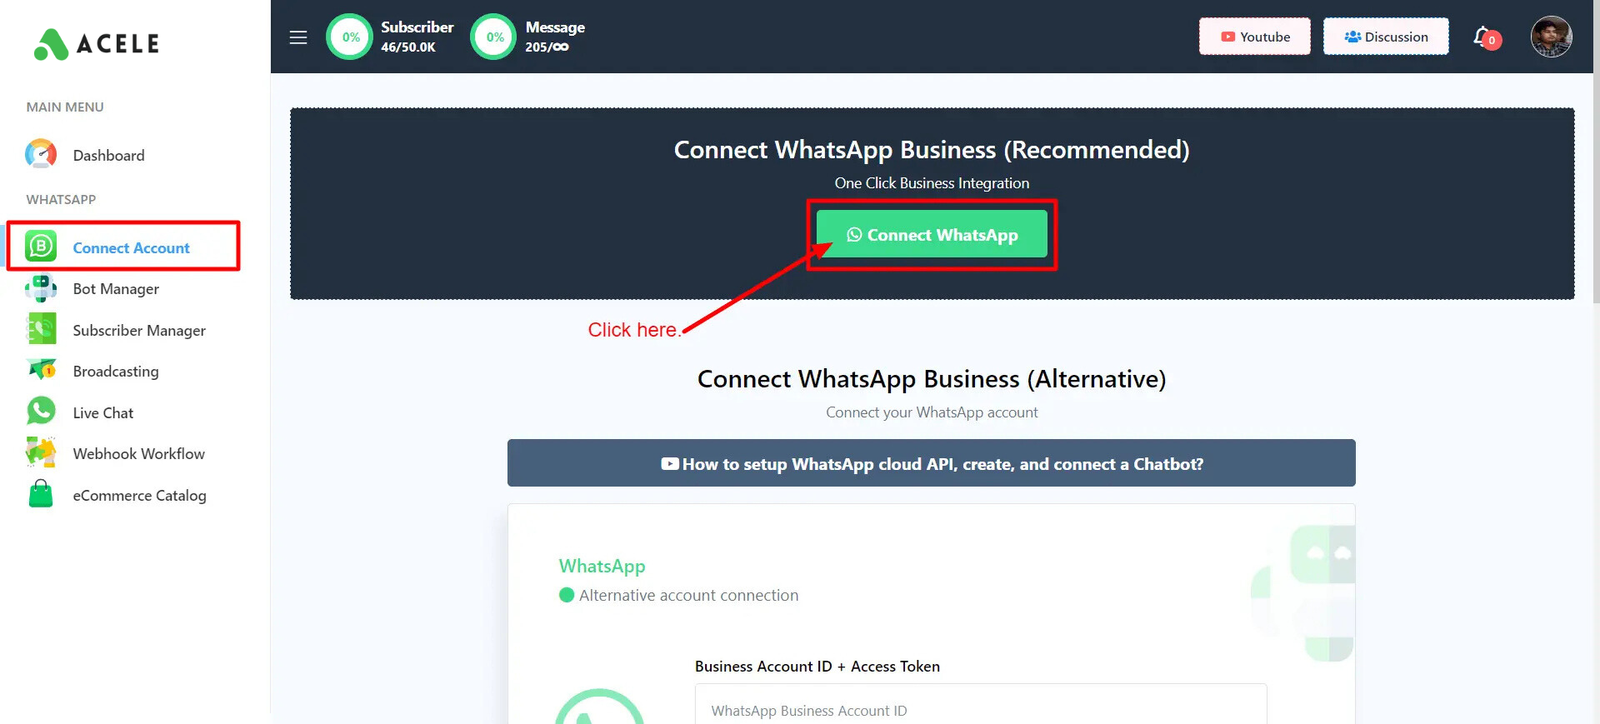
Let’s see how to do that. From the Acele’s dashboard go to WhatsApp Connect Account, then click on the “Connect WhatsApp” button.
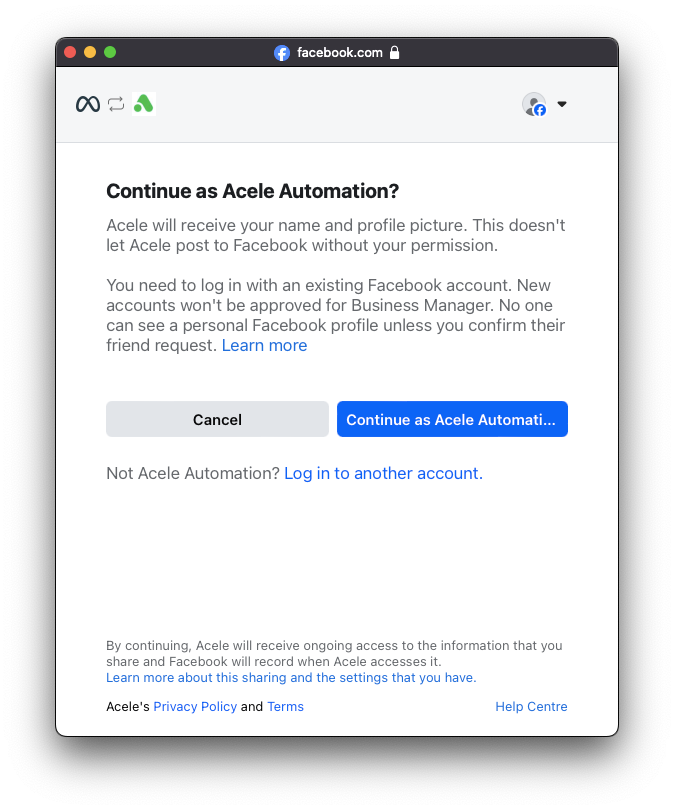
It will ask you to log in to your Facebook account. If you are already logged in, just click on the “Continue as” button.
In the next step, Meta will provide you with some information about the permissions you will share. You just need to click on the “Get Started” button from there.

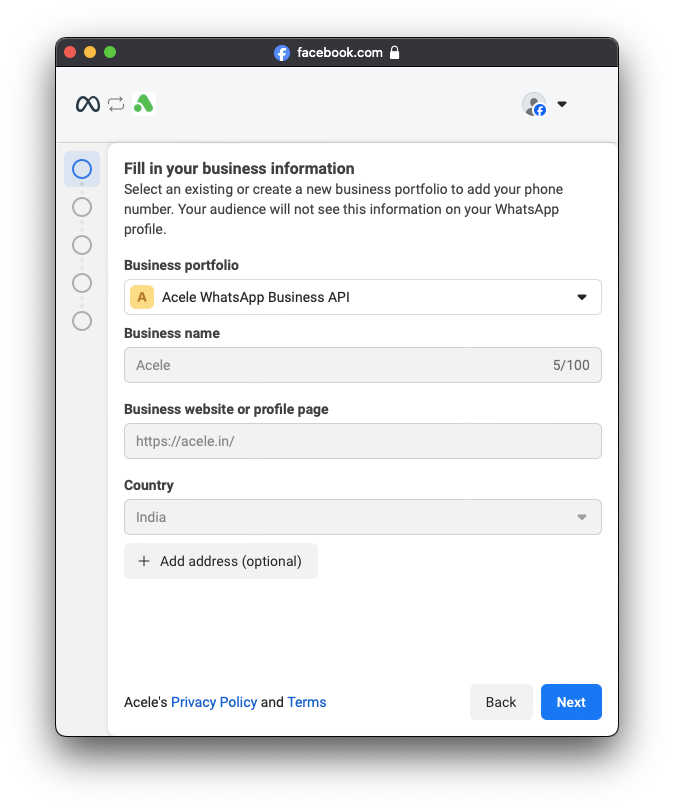
In the next step, you have to select your business profile. If you don’t have a business profile created, please create one from Facebook Business. Then provide the name of your business, add your business website or your profile page URL, select the country, and then click on the “Next” button.
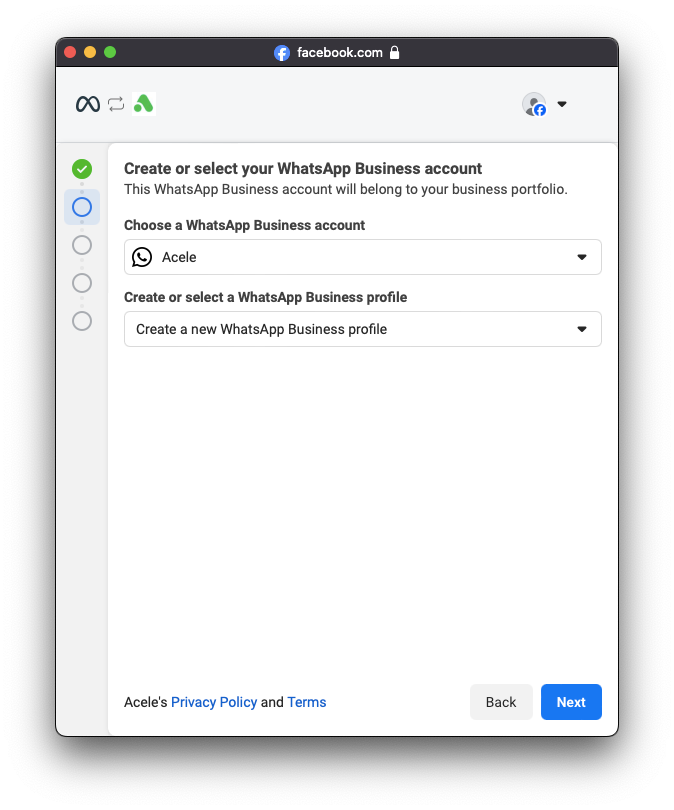
Next, choose a WhatsApp business account. If you don’t have one, select the option to create one. When you click on the drop-down menu, it will show your WhatsApp business accounts and an option to create one. Choose what is appropriate for you. Then select a WhatsApp business profile if you already have one, or select the option to create one. After that, click on the “Next” button.
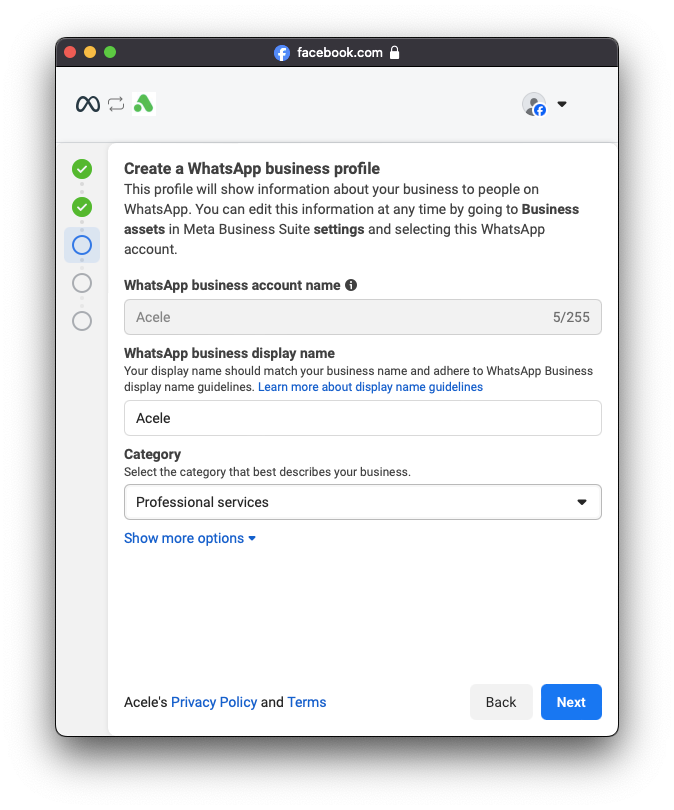
In the previous step, we didn’t select any existing WhatsApp business profile; instead, we selected the option to create one. So, in this step, we need to add the details of our WhatsApp business profile. Let’s add the WhatsApp display name here. [The WhatsApp display name should be similar to your WhatsApp business name.] Then select the category of your business and click on the “Next” button.
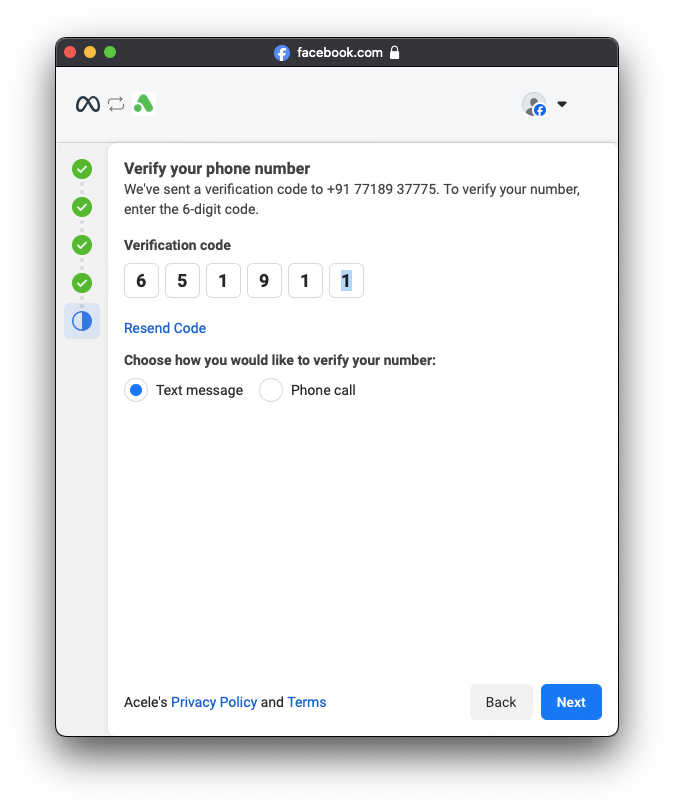
Next, add the phone number you want to use for your WhatsApp Cloud API. You cannot use any existing WhatsApp number here. If you want to use your existing WhatsApp number, you need to remove it from WhatsApp first, then you can use it. Then choose how you want to receive the verification code from Meta and click on the “Next” button. Enter the verification code you received from Meta and click “Next”.

In the next step, it will ask you to select a WhatsApp Catalog. If you don’t have a catalog created, please create one first. If you don’t know how to create a catalog, please read the blog given below to learn how.
After selecting the catalog, click “Next.”
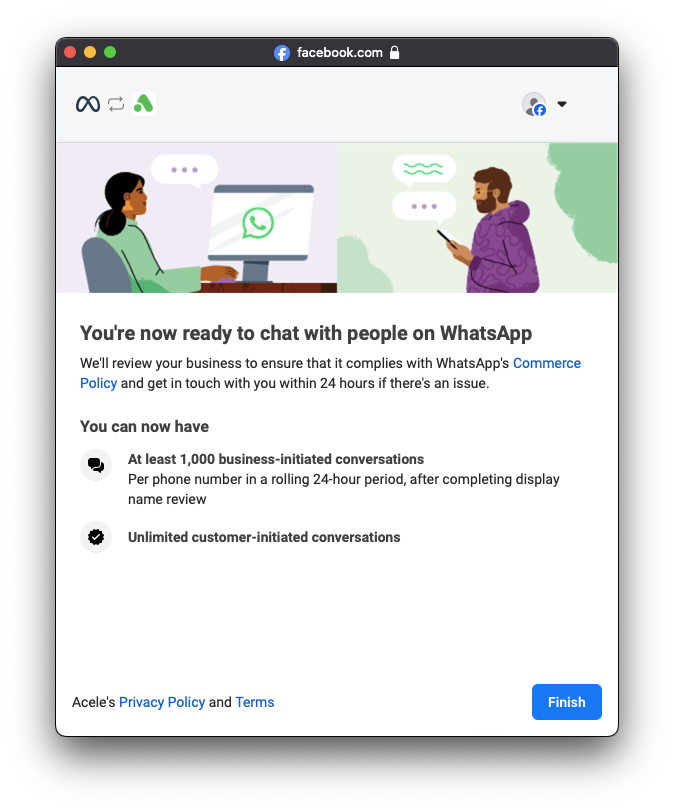
Now, review the permissions and click on the “Finish” button.